Snapshots
The Snapshots panel provides access to Traffic Snapshots directly from the dashboard. Create new snapshots, browse existing ones, and run Delayed Dissection on captured traffic.
Creating Snapshots
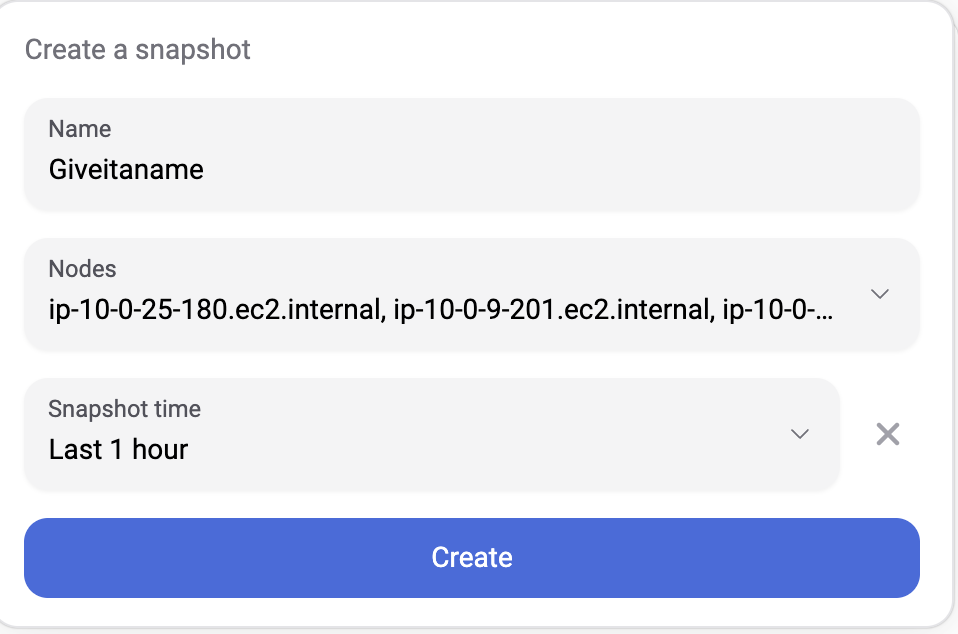
To create a new snapshot:
- Name — Enter a descriptive name (e.g.,
incident-2024-02-01,checkout-debug) - Nodes — Select all nodes or specific worker nodes to include
- Time Window — Choose the time range (e.g., last 5 minutes, last 1 hour, last 12 hours)
- Click Create
The snapshot is extracted from Raw Capture buffers and moved to dedicated storage on the Hub.
| Constraint | Description |
|---|---|
| Maximum window | Limited by raw capture buffer size and traffic rate |
| Availability | Data must not have been recycled from raw capture |
Browsing Snapshots
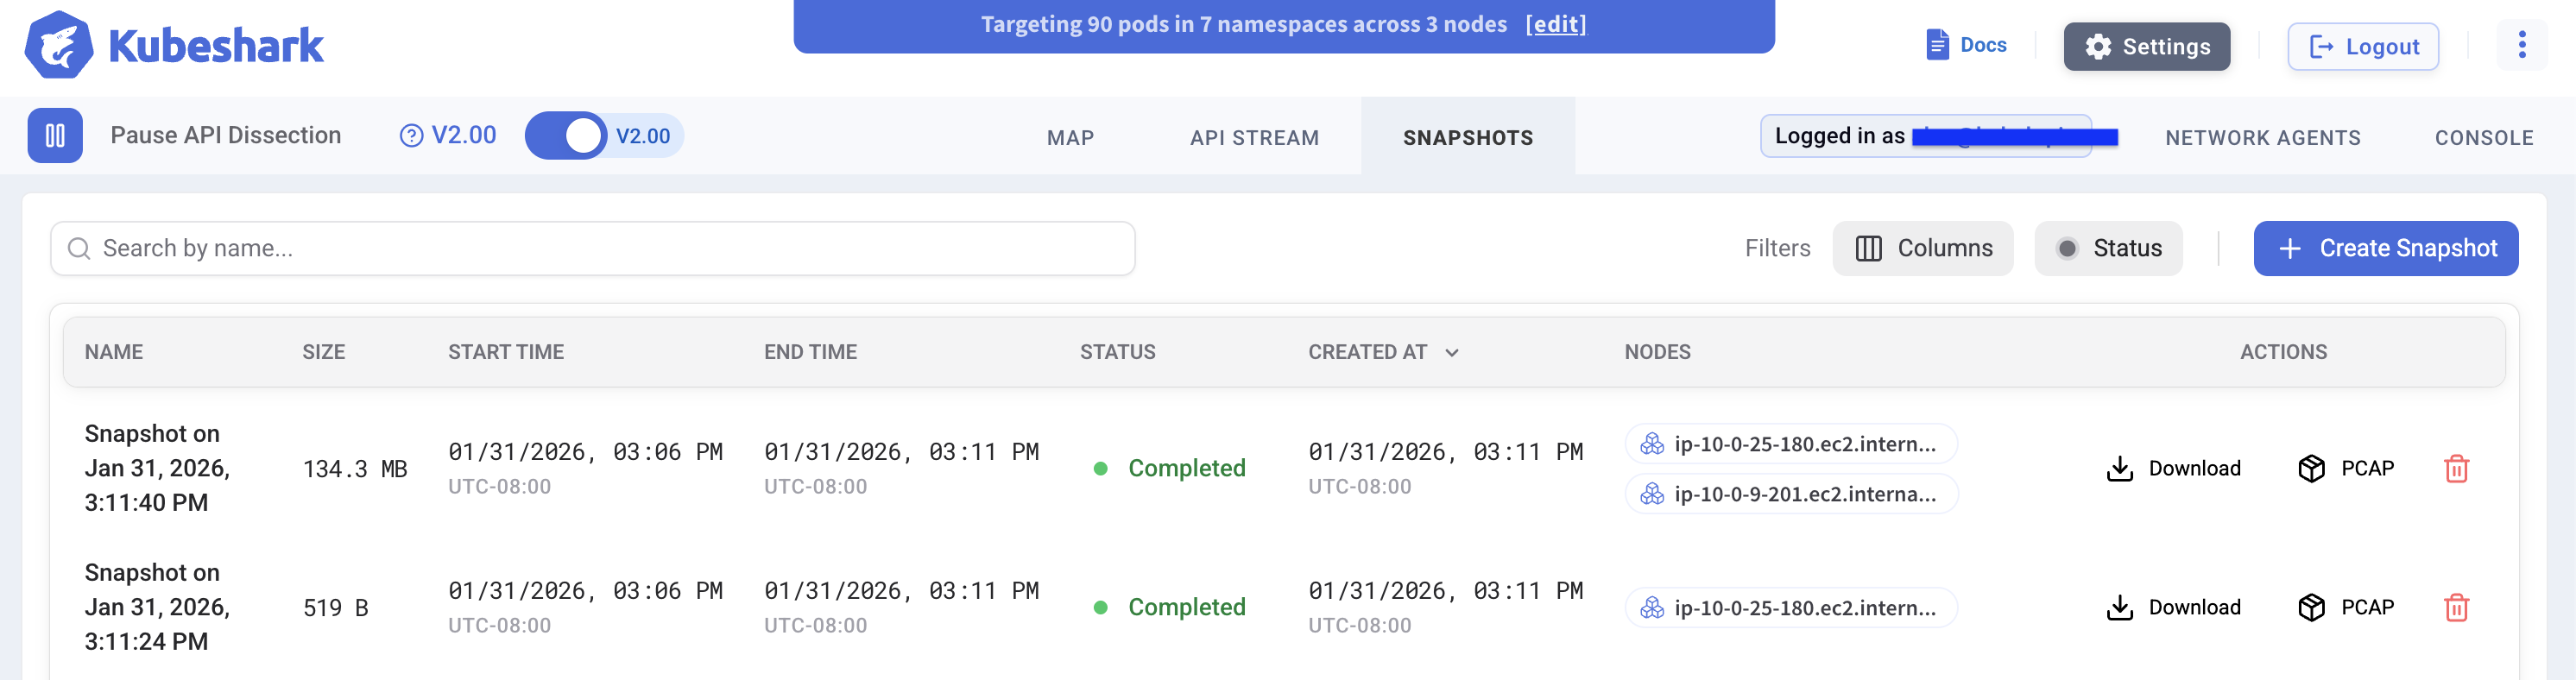
The Snapshots tab displays all available snapshots:
| Field | Description |
|---|---|
| Name | Snapshot identifier |
| Size | Total data size |
| Start Time / End Time | Captured time window |
| Status | Pending, In Progress, Completed, Dissected |
| Created At | When the snapshot was created |
| Nodes | Which nodes are included |
Snapshot Actions
| Action | Description |
|---|---|
| Dissect | Run Delayed Dissection on the snapshot |
| Download | Retrieve the snapshot archive for offline storage |
| PCAP | Export to PCAP file for Wireshark analysis |
| Delete | Remove the snapshot and free storage |
Running Delayed Dissection
To analyze a snapshot with L7 protocol dissection:
- Select the snapshot from the list
- Click Dissect to start Delayed Dissection
- Monitor progress as the snapshot is processed
- Once complete, view dissected API calls in the L7 API Stream
Dissection runs on the Hub, not on worker nodes—keeping production compute unaffected.
Viewing Dissected Snapshots
After dissection completes, the snapshot’s API calls appear in the L7 API Stream. Use Display Filters to navigate the dissected traffic.
The stream shows the same rich data as real-time dissection:
- Full request/response payloads
- Headers and status codes
- Kubernetes context (pod, service, namespace)
- Timing information
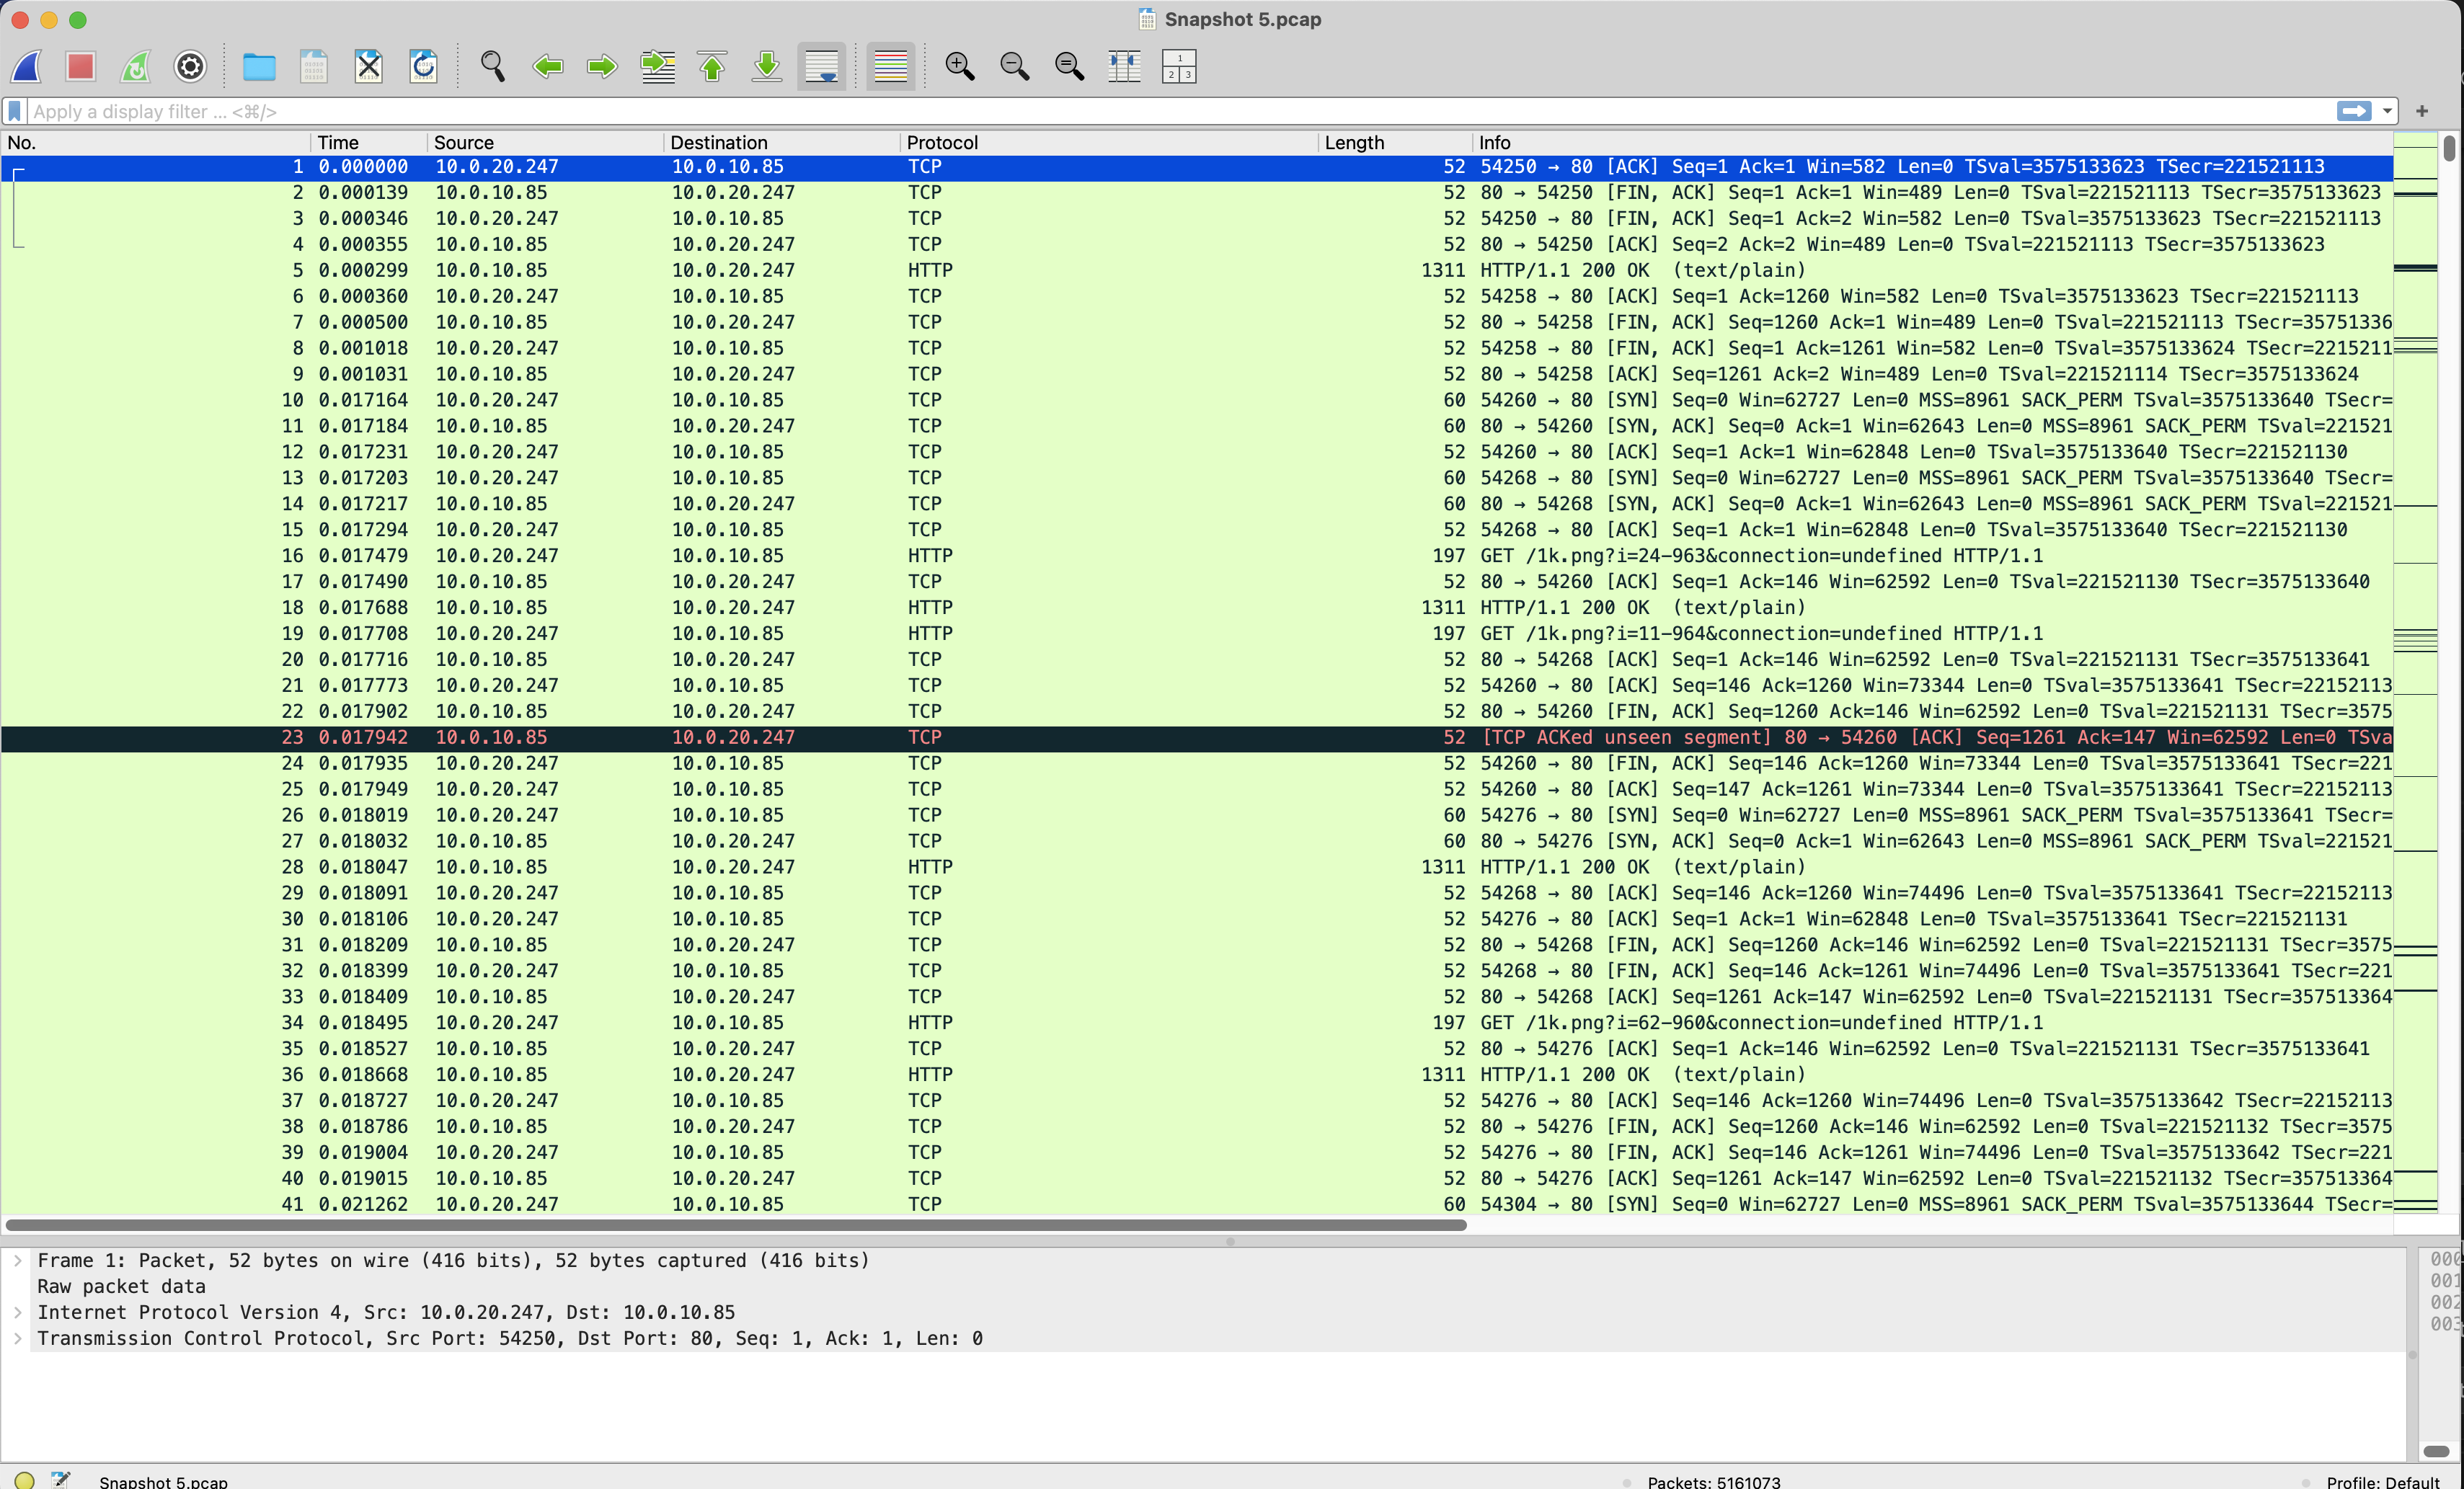
PCAP Export
Export snapshots as PCAP files for analysis in Wireshark—an alternative to deploying tcpdump, copying files from nodes, and manually aggregating them.
Snapshots include all raw TCP/UDP packets, including decrypted TLS traffic, along with Kubernetes and OS context.
To export:
- Select a snapshot from the list
- Click PCAP
- Open the downloaded file in Wireshark
Cloud Storage
When Cloud Storage is configured, a connection badge appears in the Snapshots toolbar indicating the provider and connection status:

A green Connected to S3 (or Connected to Azure Blob) badge confirms the hub has validated access to the configured bucket or container. If the connection fails, the hub will not start — see Cloud Storage for Snapshots for troubleshooting.
Snapshot Location
A snapshot can exist locally, in the cloud, or both. The Location column shows the current state:
| Location | Description |
|---|---|
| Local | Stored on the hub only |
| Cloud | Stored in cloud storage only |
| Local + Cloud | Stored in both locations |
All operations — Download, PCAP export, and Delayed Dissection — require the snapshot to be local. Cloud-only snapshots must be downloaded to the hub before these actions are available.
Uploading to the Cloud
New snapshots are always created locally and display a Local badge. To upload a snapshot to cloud storage, click the cloud upload button next to the Local badge:

Once uploaded, the snapshot is available from any cluster that shares the same cloud storage configuration — enabling cross-cluster sharing, backup/restore, and long-term retention.
Deleting Snapshots
Snapshots can be deleted independently from each location. When a snapshot exists in both locations, you can choose to delete it locally, from the cloud, or both.
Location Filter
Use the Location filter in the toolbar to show snapshots by location:
| Filter | Description |
|---|---|
| All | Show all snapshots regardless of location |
| Local | Show only snapshots stored locally on the hub |
| Cloud | Show only snapshots stored in cloud storage |
Best Practices
Naming Conventions
Use descriptive names that include context:
incident-2024-02-01-checkout-failuredebug-payment-service-slowaudit-q1-2024
When to Create Snapshots
| Scenario | Recommendation |
|---|---|
| Incident reported | Immediately capture relevant time window |
| Before maintenance | Preserve baseline traffic for comparison |
| Compliance audit | Create periodic snapshots per retention policy |
| Performance investigation | Capture before and during load tests |
Storage Management
Monitor snapshot storage usage. Snapshots persist until explicitly deleted.
tap:
  snapshots:
    local:
      storageSize: 100Gi    # Allocate sufficient local storage
For long-term retention, consider enabling Cloud Storage for Snapshots to upload snapshots to S3 or Azure Blob Storage.
See Helm Configuration for storage settings.
What’s Next
- Traffic Snapshots — Conceptual overview
- Delayed Dissection — Run L7 analysis on snapshots